Author: deejayr112780

  • Weatherstripping 101: Seal the Drafts Around Your Doors, Windows, and Garage

    Disclosure: This post contains affiliate links. If you buy through them, Built & Backyard may earn a commission at no extra cost to you.

    Quick answer

    Weatherstripping is the cheapest comfort upgrade you can make: about $30–$100 in materials seals most of a house’s doors and windows in one afternoon. Do it in this order — exterior doors (including the door sweep), the garage door bottom and perimeter, then windows. Match the seal to the gap: V-strip or kerf foam for door sides and tops, a sweep for the bottom, a bottom seal + perimeter seal for the garage door, and foam tape or a shrink-film kit for windows. ENERGY STAR estimates that sealing air leaks (with insulation) saves about 15% on heating and cooling costs — and the rooms simply feel warmer at the same thermostat setting.

    First: find the drafts

    Don’t guess. On a cold or windy day:

    • Hand test: Run your palm slowly around door and window frames. Moving air is obvious.
    • Paper test: Close a dollar bill in the door at several points. If it slides out with no drag, the seal at that spot is gone.
    • Smoke test: Hold a lit incense stick near edges and watch where the smoke wavers (turn off the furnace fan first). This finds leaks you’d never feel.

    Mark each bad spot with painter’s tape so your shopping list matches reality.

    Where the air actually leaks

    Doors and windows get the blame, but they’re only part of the picture in a typical home:

    Leak location Approx. share of air leakage
    Floors, walls, ceilings (attic) ~31%
    Plumbing/electrical/HVAC penetrations ~17%
    Ducts ~15%
    Fireplace ~14%
    Doors ~11%
    Windows ~10%

    Translation: weatherstrip the doors and windows because it’s fast and cheap — then look up. The attic hatch and penetrations are where the big losses hide (our garage insulation guide covers the same principle for the garage).

    The main types, and where each one wins

    Type Best for Lifespan Notes
    V-strip (plastic/metal) Door/window sides & tops 5+ years Springs open to fill the gap; nearly invisible
    Kerf foam (door-slot) Pre-grooved door frames 3–5 years Presses into the slot around modern doors; no glue
    Foam tape (self-stick) Irregular gaps, windows 1–3 years Cheapest and easiest; compresses flat over time
    EPDM rubber tape Doors that close flat on a stop 5+ years Seals well down to very cold temps; install at 40–90°F
    Door sweep Bottom of exterior doors 5+ years The single biggest door draft is usually underneath
    Garage door bottom seal Bottom of garage door 3–5 years Rubber U/V channel; also keeps out water and mice
    Shrink-film window kit Windows that stay shut all winter One season Remarkably effective on old, leaky windows

    How to seal each spot

    Exterior door, sides and top (30 minutes): Pull the old stripping out of the kerf slot (or off the stop). Press in new kerf foam — no tools beyond scissors — or stick EPDM tape on the stop where the door face lands. The door should close with slight resistance and pass the paper test all the way around.

    Exterior door, bottom (20 minutes): Daylight under the door means a worn sweep or threshold. Most sweeps unscrew from the inside face; swap in the new one, adjust so the fins just kiss the threshold, done.

    Garage door (1 hour): Two separate jobs. The bottom seal slides or presses into the retainer channel across the door’s bottom edge — pull the old rubber out, feed the new one in with soapy water as lubricant. The perimeter seal (vinyl flap on a rigid strip) nails to the frame so the flap presses against the door face on the top and sides. Together they stop the whistle, the dust, and most of the water that creeps under the door. This is Step 2 of sealing a garage for heat — pair it with the sizing numbers in our garage heater guide and you’ll feel the difference the first cold night.

    Windows (10 minutes each): Foam tape on the sash edges for windows you still open. For windows that stay shut until spring, a shrink-film kit (tape + film + hair dryer) honestly outperforms most permanent fixes on old double-hungs.

    Our picks

    Best for the garage door: M-D Building Products Garage Door Bottom Seal
    Heavy-duty rubber seal that fits standard retainer channels, stays flexible in the cold, and closes the gap that lets in drafts, water, and critters. Measure your door width and channel type before ordering.
    → Check price on Amazon

    Best all-rounder for doors: Frost King V-Seal Weatherstrip
    The classic V-strip: folds into a springy seal for door and window sides/tops, lasts for years, and can even be applied in colder weather than foam tapes (rated down to about 20°F). One roll handles a couple of doors.
    → Check price on Amazon

    Best for leaky windows: Duck Brand Max Strength Window Insulation Kit
    Shrink-film kit with film twice as thick as standard kits; covers up to five windows. On old single-pane or rattly double-hung windows, this is the biggest comfort gain per dollar on this page.
    → Check price on Amazon

    5 mistakes that ruin a sealing job

    1. Installing tape on dirty or cold surfaces. Adhesive fails below ~40°F and on dusty paint. Clean with alcohol, warm the strip indoors, and it sticks for years.
    2. Sealing over the old, dead stripping. Compressed foam seals nothing. Pull the old stuff first.
    3. Too thick a seal. If the door needs shoulder pressure to latch, the seal is oversized — it’ll tear itself apart and strain the hinges.
    4. Forgetting the door bottom. Sides and top get all the attention; the under-door gap is usually the largest single opening.
    5. Sealing vents and combustion air. Never block the air supply or flues for a furnace, water heater, or fireplace, and keep working CO alarms in the house. A tighter house is the goal — a sealed-tight one with gas appliances needs a tech’s venting check.

    FAQ

    How much does weatherstripping save, really?
    ENERGY STAR pegs air sealing plus insulation at roughly 15% of heating and cooling costs (about 11% of the total energy bill), and DOE estimates draft reduction alone can cut home energy use 5–30% depending on how leaky the house was. Doors and windows are the easy slice of that.

    When is the best time to install it?
    A mild fall day — exactly now. Most adhesive products want 40–90°F surfaces. V-strip and nail-on products are more forgiving of cold.

    How long does weatherstripping last?
    Foam tape: 1–3 years. Kerf foam and EPDM: 3–5+. V-strip and sweeps: 5+ years. Check the paper test every fall and replace only what’s failed.

    Should I weatherstrip before insulating or buying a heater?
    Seal first — it’s the cheapest step and it makes everything after it work better. Then insulate, then size the heater to the tightened space.

    Renting or can’t modify the door?
    Removable options exist: rope caulk and removable sealant for window gaps, and fabric draft stoppers for under doors. Not as good, but far better than a towel.


    This guide completes the fall garage series — seal the drafts here, then insulate and size your heater right.
  • How to Insulate a Garage: Walls, Ceiling, and the Door (R-Value Guide)

    Disclosure: This post contains affiliate links. If you buy through them, Built & Backyard may earn a commission at no extra cost to you.

    Quick answer

    Insulate in this order: garage door first, then air-seal the gaps, then walls, then ceiling. Target R-13 to R-15 in 2×4 walls (R-19+ in 2×6 walls in cold climates), R-30 to R-38 in the ceiling, and R-6 to R-8 on the door with a retrofit kit. A full DIY job on a 2-car garage typically runs $300–$800 in materials with fiberglass batts — and it cuts the heater size you need almost in half (see our garage heater sizing guide).

    Why insulate before you heat

    An uninsulated garage is basically a metal-and-drywall tent. Heat pours out through the door (the biggest single surface), leaks around it, and rises straight through an uninsulated ceiling. Insulating first means:

    • A smaller, cheaper heater does the job
    • The garage stays workable longer after the heater cycles off
    • Less condensation on tools, and quieter inside

    Step 1: Insulate the garage door

    The door is the largest moving wall in your house and usually the worst insulated. A steel door with no insulation is roughly R-1 to R-2 — a blanket would do better.

    A reflective foam-core kit (look for R-8) friction-fits or tapes into each door panel. Budget about 1–2 hours and $100–$200 per door. Check the door balance afterward: kits are light, but if the door feels heavy to lift manually, have the spring tension adjusted by a pro — don’t adjust torsion springs yourself.

    Step 2: Air-seal the gaps

    Insulation slows heat flow; it doesn’t stop air leaks. Before walls, seal:

    • The perimeter of the garage door (weatherstripping and a bottom seal)
    • Gaps around windows, outlets, and the house-entry door
    • The rim/band joist area above the walls with foam sealant

    A few cans of foam sealant and an afternoon make insulated walls actually perform to their rating. Our full weatherstripping guide walks through every seal, spot by spot.

    Step 3: Insulate the walls

    If your studs are exposed, fiberglass batts are the cheapest, easiest DIY route — friction-fit them between studs, paper (vapor retarder) side facing the warm interior, and don’t compress them (a squished batt loses R-value).

    Wall framingMild climate (Zones 1–3)Cold climate (Zones 4–7)
    2×4 studsR-13R-13 to R-15
    2×6 studsR-19R-19 to R-21

    Finished walls? Blown-in cellulose through small drilled holes is the standard fix — usually a rental-machine weekend or a pro job.

    Step 4: Insulate the ceiling

    Heat rises, so the ceiling matters most after the door. Target R-30 minimum, R-38 in cold climates, especially if there’s a room above the garage (code often requires it there). Batts between joists or blown-in over existing drywall both work.

    Material comparison

    MaterialR-value per inchMaterial costBest forDIY level
    Fiberglass battsR-3.1–3.8~$0.30–$0.80/sq ftOpen stud walls, ceilingsEasy
    Rigid foam boardR-5–6.5~$0.50–$1.20/sq ftGarage doors, block wallsModerate
    Spray foam (closed-cell)~R-6.5~$1.00–$4.50/sq ftAir sealing, rim joistsPro (kits for small areas)
    Blown-in celluloseR-3.2–3.8~$0.40–$1.00/sq ftFinished ceilings/wallsModerate (rental)

    Our picks

    Best for the door: NASA TECH 2-Car Garage Door Insulation Kit (R-8)
    Reflective foam-core rolls that cover a door up to 18 ft × 8 ft, with tape, razor, and squeegee included. Fire-rated, waterproof, and the single biggest comfort upgrade per dollar in most garages.
    → Check price on Amazon

    Best for walls: Owens Corning R-13 Kraft-Faced Batts
    The pink standard. Pre-cut for 16-inch stud spacing, kraft face doubles as the vapor retarder, and a roll covers a lot of wall for the money. Size up to R-15 (2×4) or R-19 (2×6) in cold climates.
    → Check price on Amazon

    Best for gaps: Great Stuff Gaps & Cracks Foam Sealant
    For the rim joists, pipe penetrations, and framing gaps that batts can’t fill. A $5 can here routinely outperforms $50 of extra batt R-value, because moving air defeats insulation.
    → Check price on Amazon

    5 mistakes that waste money

    1. Insulating walls but skipping the door. The door is the biggest heat leak — do it first.
    2. Compressing batts. Stuffing R-19 into a 2×4 wall gives you about R-13 performance at R-19 prices.
    3. No air sealing. Insulation over open gaps is a sweater with the zipper down.
    4. Vapor retarder on the wrong side. Faced batts go paper-side toward the heated space in cold climates.
    5. Blocking attic ventilation. Keep soffit vents clear with baffles when you insulate the ceiling, or you’ll trade heat loss for moisture problems.

    FAQ

    Should I insulate before or after buying a garage heater?
    Before. Insulation can drop your required heater size by a full tier — use our heater sizing guide with the “insulated” numbers once the job is done.

    Is it worth insulating an unheated garage?
    Insulate any wall or ceiling shared with the house regardless — it protects the rooms inside. Exterior walls of a detached, unheated garage are optional unless you plan to heat it later.

    What’s the cheapest way to insulate a garage?
    Fiberglass batts in open stud walls (roughly $0.30–$0.80/sq ft in materials) plus a door kit. Most 2-car garages land between $300 and $800 total, DIY.

    Do I need drywall over the insulation?
    Many local codes require a fire barrier (typically ½-inch drywall) over foam plastics and in attached garages, especially on the house wall and ceiling under living space. Check your local code before leaving foam board or spray foam exposed.

    How long does a DIY garage insulation job take?
    A door kit is 1–2 hours. Walls and ceiling in a 2-car garage are a solid weekend for one person with exposed studs.


    Next up in this series: sealing the drafts — our weatherstripping guide. And if you’re sizing heat for the space, start with What Size Heater Does a 2-Car Garage Need?

  • What Size Heater Does a 2-Car Garage Need? (BTU Guide + Picks)

    Disclosure: This post contains affiliate links. If you buy through them, we may earn a commission at no extra cost to you.

    Cold tools, numb fingers, and a project that waits until April — if that sounds familiar, a garage heater is the fix. But buy the wrong size and you’ll either freeze anyway or waste money heating a space that never warms up. Here’s how to size it right the first time.

    The Quick Answer

    A typical 2-car garage is 400–600 square feet. For most of them, you need:

    • 25,000–35,000 BTU if the garage is insulated and in a cold climate
    • 35,000–50,000 BTU if it’s uninsulated, detached, or has high ceilings
    • In electric terms, that’s roughly a 7,500–10,000 watt 240V heater — or a 50,000 BTU gas unit heater, the most popular size for a 2-car garage

    If you only remember one thing: it’s cheaper to insulate than to oversize. A well-sealed garage can cut your heater size (and your heating bill) nearly in half.

    Step 1: Measure Your Garage

    Multiply length × width for square footage. A standard 2-car garage is about 20×20 (400 sq ft) up to 24×24 (576 sq ft). Note your ceiling height too — a 12-foot ceiling for a lift holds a third more air than a 9-foot ceiling, and that air all has to be heated.

    Step 2: Rate Your Insulation

    Insulation is the single biggest factor in heater size. Use these BTU-per-square-foot figures for a cold climate:

    Insulation levelBTU per sq ft
    Good — insulated walls, ceiling, and garage door20–30
    Average — insulated walls, bare ceiling or door30–40
    Poor — no insulation, drafty door50–60

    In milder climates, scale those numbers down by about a third.

    Step 3: Do the Math

    Multiply square footage × your BTU-per-square-foot figure.

    Worked example: A 24×24 garage (576 sq ft) with average insulation in a cold climate:
    576 × 40 = ~23,000 BTU minimum — so a 25,000–35,000 BTU heater gives you comfortable working heat with a little headroom for the coldest days. The same garage with no insulation needs 576 × 55 = ~32,000–50,000 BTU, which is why uninsulated garages usually end up with a 50,000 BTU gas unit.

    Shopping for electric? Convert with this: 1 watt = 3.41 BTU. So a 5,000W heater puts out about 17,000 BTU, a 7,500W about 25,600 BTU, and a 10,000W about 34,100 BTU.

    Sizing Chart (cold climate, ~50°F temperature rise)

    GarageInsulatedSome insulationUninsulated
    1-car (12×22)~11,000 BTU~14,000 BTU~21,000 BTU
    2-car (24×24, 9 ft ceiling)~26,000 BTU~35,000 BTU~52,000 BTU
    2-car (24×24, 12 ft ceiling)~35,000 BTU~46,000 BTU~69,000 BTU
    3-car (36×24)~43,000 BTU~58,000 BTU~86,000 BTU

    Which Type of Heater Should You Buy?

    Electric forced-air (240V) — Clean, quiet, no venting, thermostat control. Cheapest to buy, most expensive to run. Best for insulated garages you use a few hours at a time. Needs a 240V circuit (30–50 amps), so budget for an electrician if you don’t have one.

    Natural gas / propane unit heater — The workhorse choice. Highest heat output per dollar of fuel, ceiling-mounted and out of the way. Needs a gas line and venting, so installation costs more up front — but for an uninsulated or detached 2-car garage in a cold climate, it’s usually the only type that truly keeps up.

    Portable propane (torpedo or convection) — Cheap, powerful, no installation. Loud, produces moisture and fumes, and needs ventilation and clearance from anything flammable. Fine for occasional use while you work; not a set-and-forget solution.

    Infrared / radiant — Heats people and objects instead of the air, so it feels warm fast even in a drafty space. Good as spot heat over a workbench, weak as whole-garage heat.

    Our Picks for a 2-Car Garage

    Best gas unit heater: Mr. Heater Big Maxx MHU50 — 50,000 BTU

    The default recommendation for a reason. 50,000 BTU covers a 2-car garage in all but the worst-insulated cases, it mounts to the ceiling with the included brackets, vents horizontally or vertically, and ships with a propane conversion kit if you don’t have natural gas. You’ll need a thermostat and gas hookup — many owners have an HVAC tech do the final connection.

    👉 Check the price of the Big Maxx MHU50 on Amazon

    Best electric option: Dr. Infrared Heater DR-988 — 5,600W / 240V

    If you have a 240V outlet in the garage (or plan to add one) and your garage is reasonably insulated, this is the simple route: no gas line, no venting, built-in thermostat, and it’s portable enough to move where you’re working. At about 19,100 BTU it’s honestly sized for an insulated 1- to 2-car garage — if your Step 3 math says 30,000+ BTU, step up to a 7,500–10,000W hardwired electric unit instead.

    👉 Check the price of the DR-988 on Amazon

    Best budget spot heat: Mr. Heater Buddy (MH9BX) — 4,000 / 9,000 BTU

    This won’t heat a whole 2-car garage — no portable this size will. What it does brilliantly is warm you and about 225 sq ft around your workbench, runs on a 1 lb propane bottle, and has an oxygen-depletion sensor and tip-over shutoff. It’s the cheapest way to make short garage sessions comfortable, and a good backup to keep in the corner.

    👉 Check the price of the Mr. Heater Buddy on Amazon

    5 Sizing Mistakes to Avoid

    1. Buying by square footage alone. Ceiling height and insulation swing the answer by 2–3×.
    2. Undersizing to save money. A too-small heater runs constantly and never catches up on the coldest days — the days you bought it for.
    3. Ignoring the garage door. An uninsulated steel door is basically a hole in your wall. A door insulation kit often pays back faster than a bigger heater — so see our garage insulation guide for the fix.
    4. Forgetting the electrical bill math. A 10,000W electric heater costs real money per hour to run. Fine for weekend projects; expensive as all-day heat.
    5. Skipping ventilation with fuel heaters. Gas and propane units need proper venting and a carbon monoxide detector in the garage. Non-negotiable.

    FAQ

    Can a 5,000-watt heater heat a 2-car garage?
    It produces about 17,000 BTU — enough for a well-insulated 2-car garage in a moderate climate, or to take the edge off in a cold one. In a cold climate with average insulation, plan on 7,500–10,000 watts.

    Is it better to oversize a garage heater?
    Slightly, yes — about 10–20% over your calculated number gives you faster warm-up. Double the size is wasteful: gas units short-cycle and electric units just cost more to buy and wire.

    What’s the cheapest way to heat a 2-car garage?
    Per hour of heat, a natural gas unit heater is cheapest to run. Cheapest to buy and install is a portable propane heater — but you’ll pay in noise, fumes, and attention.

    Should I insulate before I buy a heater?
    If your garage has bare studs and an uninsulated door, yes — sealing drafts and insulating first can drop you a full heater size — start with our weatherstripping guide.

    The Bottom Line

    For most 2-car garages: insulated → 25,000–35,000 BTU; uninsulated or detached → a 50,000 BTU gas unit heater. Do the 30-second math in Step 3 for your own space, buy 10–20% above it, and spend whatever’s left of your budget on sealing the door. You’ll be turning wrenches in a t-shirt while it’s snowing outside.

  • 5 Shop Tools That Make Garage Projects Easier

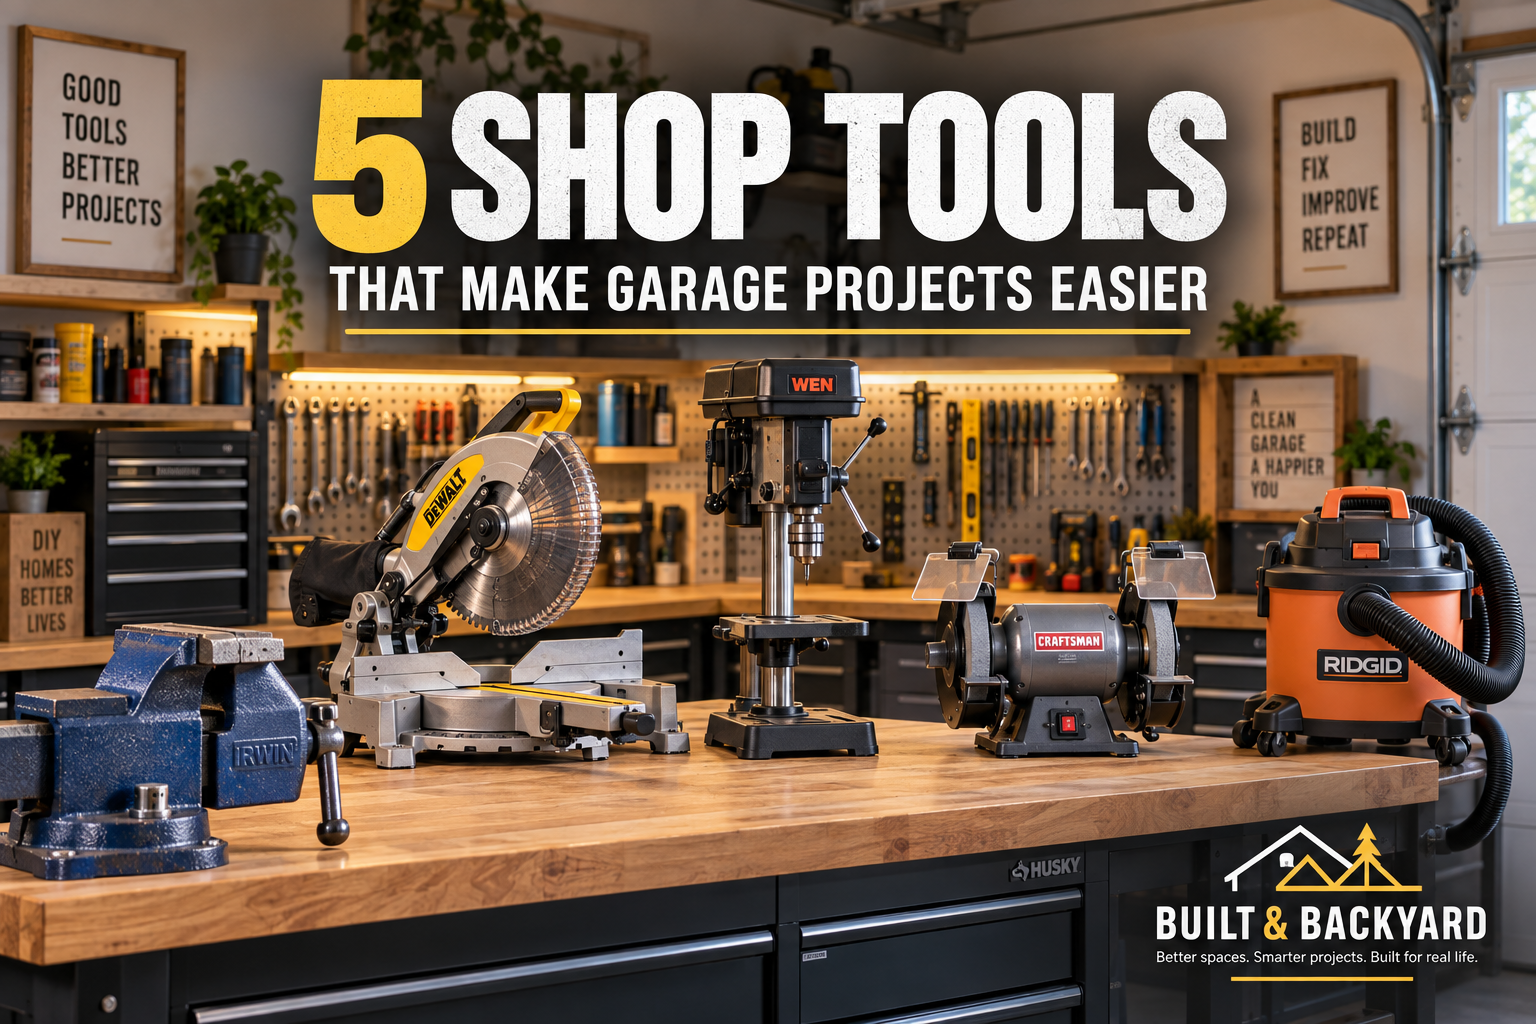
    5 Shop Tools That Make Garage Projects Easier

    You don’t need a huge workshop to make garage projects easier. A few well-chosen shop tools can save time, improve accuracy, and make weekend projects feel much more manageable.

    These five shop tools are especially useful for homeowners who like tackling repairs, builds, and upgrades in the garage.

    1. Bench Vise

    A bench vise is one of those tools that becomes more useful the more projects you take on. It holds materials securely while you cut, drill, sand, bend, or work on small repairs.

    For most homeowners, a medium-size vise mounted to a sturdy workbench is plenty for everyday garage projects.

    Built & Backyard Tip: Make sure the vise is mounted to a solid surface. A strong vise won’t help much if the workbench moves every time you tighten it.

    2. Miter Saw

    A miter saw makes it much easier to get quick, accurate cuts on boards, trim, and other lumber. It’s especially useful for projects like shelving, framing, baseboards, and simple furniture builds.

    For most homeowners, a 10-inch miter saw offers a good balance of cutting capacity, price, and garage-friendly size.

    Built & Backyard Tip: Measure twice and let the blade come to a complete stop before lifting it back up. That helps keep your cuts cleaner and your work safer.

    3. Drill Press

    A drill press is useful when you want cleaner, straighter, and more consistent holes than you can usually get with a handheld drill. It’s especially helpful for woodworking, metal projects, repeated drilling, and jobs where accuracy matters.

    For a home garage, a compact benchtop drill press is usually enough and doesn’t take up much space.

    Built & Backyard Tip: Clamp your material before drilling whenever possible. It helps keep the piece steady and makes your holes more accurate.

    4. Bench Grinder

    A bench grinder is handy for sharpening tools, smoothing rough metal edges, cleaning up bolts, and handling small metalworking jobs around the garage.

    For most homeowners, a basic 6-inch bench grinder is plenty for occasional use and doesn’t take up much room on the workbench.

    Built & Backyard Tip: Keep the tool rest adjusted close to the grinding wheel and use light pressure. Let the wheel do the work instead of forcing the material into it.

    5. Shop Vacuum

    A shop vacuum is one of the most useful tools you can keep in a garage or workshop. It can handle sawdust, dirt, small debris, and many wet messes that a regular household vacuum isn’t designed for.

    For most homeowners, a medium-size wet/dry vacuum gives you plenty of capacity without taking up too much space.

    Built & Backyard Tip: Use the right filter for the job, especially when cleaning up fine dust. It helps protect the motor and keeps more dust from blowing back into the room.

    Build a Garage That Works Better for You

    You don’t need a professional shop to make garage projects easier. A few dependable tools can make your workspace more efficient, help you work more accurately, and save time on weekend projects.

    Start with the tools that match the kinds of projects you actually do, then add to your setup over time.

    At Built & Backyard, we focus on practical tools and garage upgrades that make real projects easier to tackle.

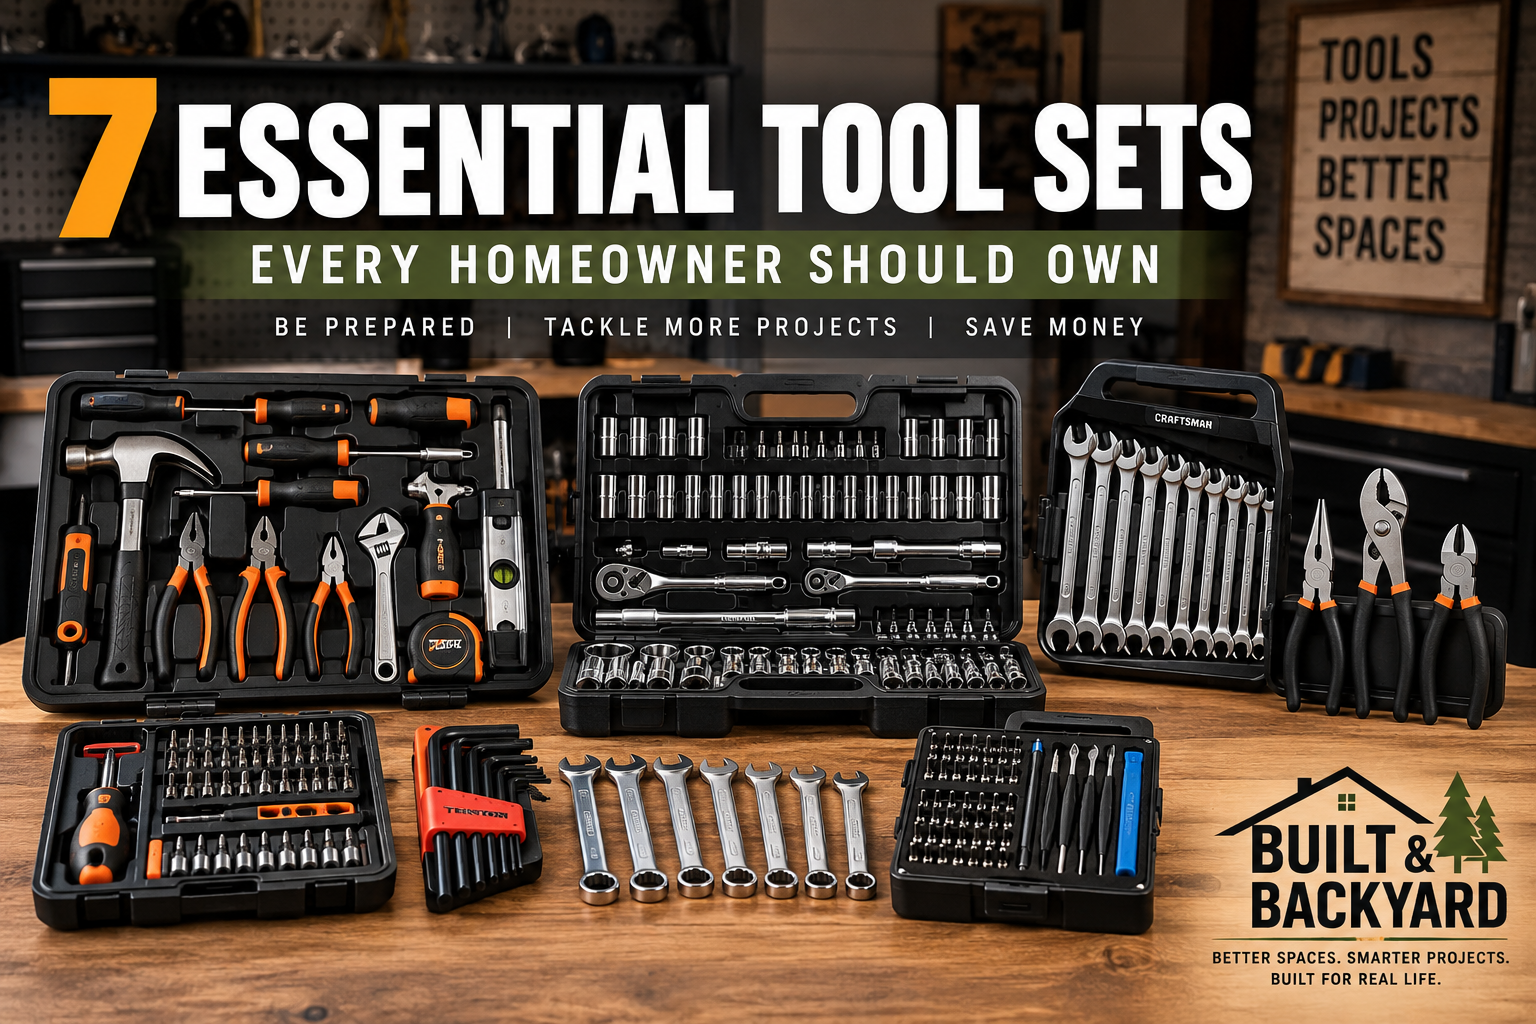
  • Best Budget Tool Sets for Homeowners

    Best Budget Tool Sets for Homeowners

    You don’t need to spend a fortune to build a dependable tool collection. A well-chosen budget tool set can cover everyday repairs, furniture assembly, basic maintenance, and plenty of weekend DIY projects.

    The key is finding a set with the tools you’ll actually use, decent build quality, and a case that keeps everything organized.

    As an Amazon Associate, Built & Backyard earns from qualifying purchases.

    1. Basic Home Repair Tool Set

    A basic home repair set is a great starting point if you don’t already own many tools. These kits usually include essentials like a hammer, screwdrivers, pliers, an adjustable wrench, a tape measure, hex keys, and a small selection of bits.

    For most homeowners, a compact set with the everyday basics is more useful than a huge kit packed with specialty pieces you may never touch.

    Built & Backyard Tip: Pay attention to the quality of the ratchet, screwdrivers, and pliers. Those are usually the tools you’ll reach for most often.

    What to Look For: Choose a set with a hammer, screwdrivers, pliers, tape measure, adjustable wrench, hex keys, and a sturdy carrying case. For a budget-friendly starter kit, focus more on useful everyday tools than on the total piece count.

    Recommended Starter Tool Set

    A compact homeowner tool kit with the everyday basics is usually the best value. Look for a set with solid hand tools, a durable case, and enough variety to handle common repairs without paying for dozens of pieces you may never use.

    Affiliate note: If you purchase through one of our links, Built & Backyard may earn a commission at no extra cost to you.

    2. Mechanics Tool Set

    A mechanics tool set is useful even if you don’t plan on doing major vehicle repairs. These sets usually include ratchets, sockets, extensions, and combination wrenches that can come in handy for lawn equipment, bicycles, furniture, and general garage projects.

    For most homeowners, a smaller set with both SAE and metric sizes will cover a lot of everyday jobs without taking up too much space.

    Built & Backyard Tip: Look for a set with clearly labeled socket sizes and a sturdy case. It makes finding the right piece much faster.

    What to Look For: Choose a mechanics set with both SAE and metric sockets, a solid ratchet, common wrench sizes, extensions, and a durable case that keeps everything organized.

    Recommended Mechanics Tool Set

    A mid-size mechanics set with both SAE and metric sockets is usually the sweet spot for homeowners. Look for a sturdy ratchet, useful extensions, clearly marked sizes, and a case that keeps everything easy to find.

    Affiliate note: If you purchase through one of our links, Built & Backyard may earn a commission at no extra cost to you.

    3. Screwdriver and Bit Set

    A good screwdriver and bit set can handle a surprising number of everyday jobs around the house. From tightening cabinet hardware and assembling furniture to working on electronics and replacing fixtures, it’s one of the most useful sets to keep nearby.

    Look for a kit with both Phillips and flathead options, along with common specialty bits like Torx and hex.

    Built & Backyard Tip: A ratcheting screwdriver can make repetitive jobs much faster and more comfortable, especially when you’re working in tight spaces.

    What to Look For: Choose a set with Phillips, flathead, Torx, hex, and other common bit types. A ratcheting handle, magnetic bit holder, and organized case make the set much easier to use.

    Recommended Screwdriver and Bit Set

    A versatile ratcheting screwdriver set with a wide selection of bits is a great value for most homeowners. Look for clearly labeled bits, a comfortable handle, and a compact case that keeps everything together.

    Affiliate note: If you purchase through one of our links, Built & Backyard may earn a commission at no extra cost to you.

    4. Pliers Set

    A small pliers set is useful for gripping, bending, pulling, cutting, and holding parts in place during repairs. A good starter set usually includes slip-joint pliers, needle-nose pliers, and diagonal cutting pliers.

    These can come in handy for everything from basic electrical work and plumbing fixes to small hardware repairs around the house.

    Built & Backyard Tip: Look for pliers with comfortable, non-slip handles. They’re easier to control and much nicer to use on longer jobs.

    5. Hex Key and Allen Wrench Set

    Hex keys are used on everything from furniture and bicycles to grills, exercise equipment, and shelving systems. A complete set can save you from digging through junk drawers looking for the one tiny wrench that came with a piece of furniture.

    Look for a set that includes both SAE and metric sizes, preferably in a holder that keeps everything organized.

    Built & Backyard Tip: A folding hex key set is convenient for quick jobs, but a full set of individual L-shaped keys usually gives you better reach and leverage.

    6. Combination Wrench Set

    A combination wrench set gives you both an open-end wrench and a box-end wrench in the same tool, making it useful for tightening and loosening nuts and bolts around the garage, yard equipment, furniture, and vehicles.

    For most homeowners, a basic set with both SAE and metric sizes will cover the majority of common jobs.

    Built & Backyard Tip: If you can, choose a set with clearly stamped sizes and a storage rack or roll. It keeps the set organized and makes the right wrench easier to grab.

    7. Precision Tool Set

    A precision tool set is handy for smaller jobs that regular-size tools can’t handle. These kits often include tiny screwdrivers, specialty bits, tweezers, and small pry tools for working on electronics, toys, appliances, glasses, and other detailed repairs.

    You may not use a precision set every week, but when you need one, it can save a lot of frustration.

    Built & Backyard Tip: Look for a set with a magnetic bit holder and clearly labeled bits. Small pieces are much easier to manage when everything has a dedicated spot.

    Build a Useful Tool Collection Without Overspending

    A good tool collection doesn’t have to be expensive. Start with the sets that match the kinds of repairs and projects you actually do, then add better or more specialized tools over time.

    For most homeowners, a few solid hand-tool sets can handle a huge number of jobs around the house, garage, and yard.

    At Built & Backyard, we focus on practical tools that give you real value without paying for extras you may never use.

  • 7 Power Tools Worth Owning for Weekend DIY Projects

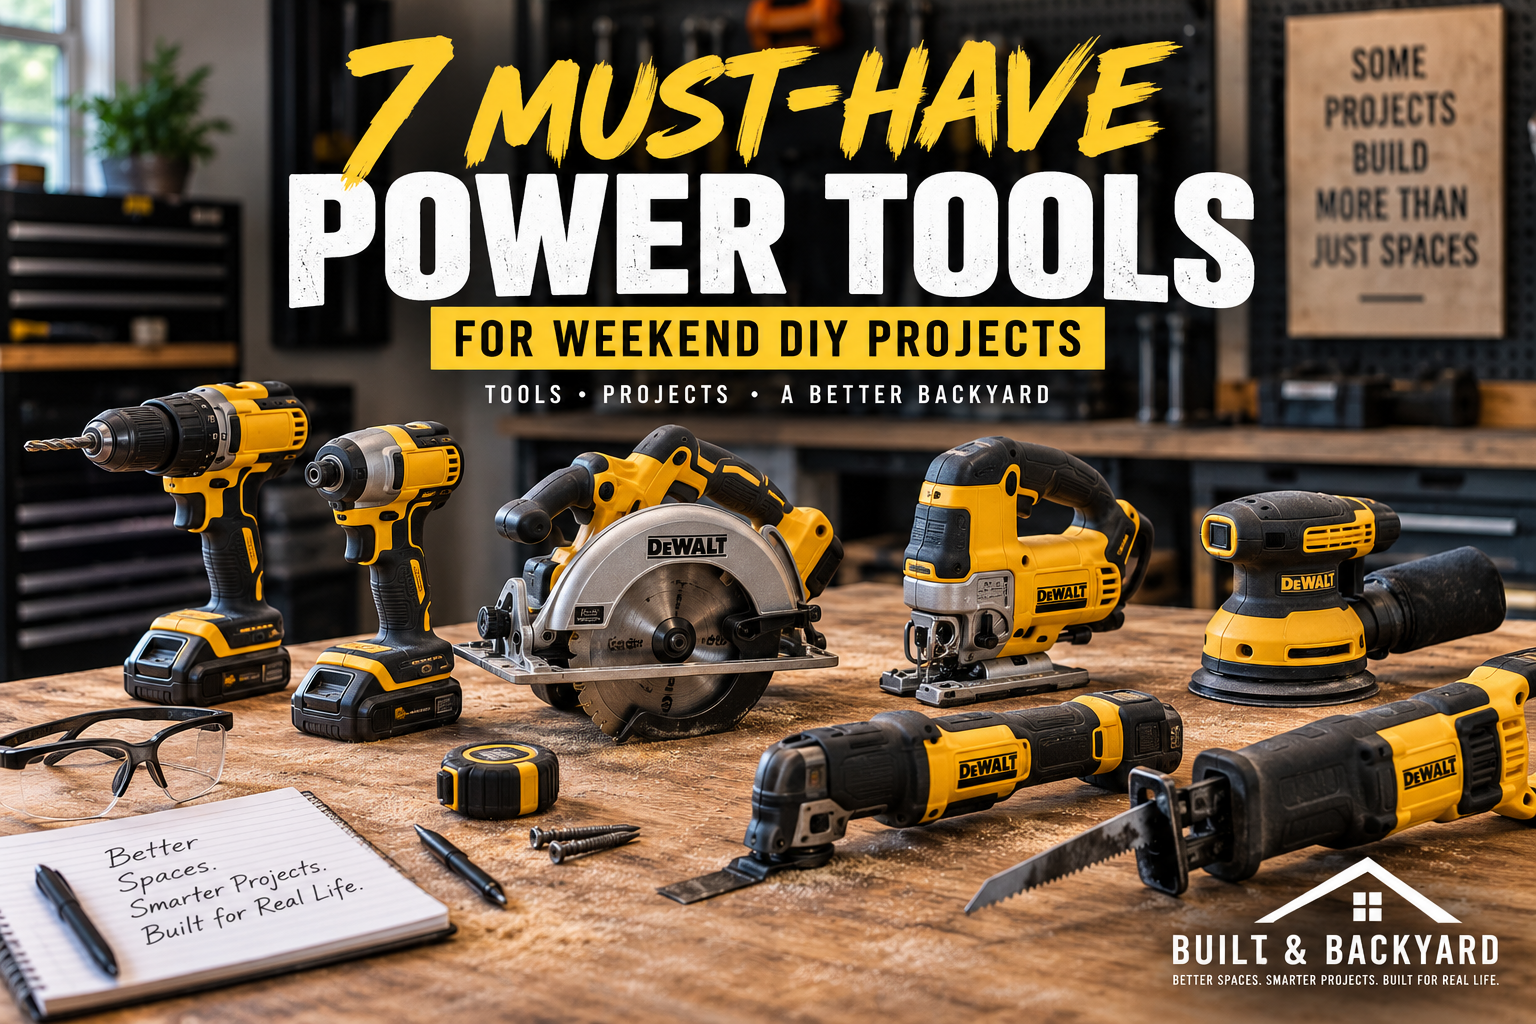
    7 Power Tools Worth Owning for Weekend DIY Projects

    You don’t need a professional workshop to tackle weekend projects around the house. A few dependable power tools can make DIY jobs faster, easier, and a lot less frustrating.

    These seven power tools are worth considering if you want to build a practical setup for repairs, upgrades, and weekend projects.

    1. Cordless Drill/Driver

    A cordless drill/driver is one of the most useful power tools you can own. It handles everything from drilling holes and driving screws to assembling furniture, hanging shelves, and tackling basic home repairs.

    For most homeowners, an 18V or 20V model is a solid choice. Look for one with variable speed, multiple clutch settings, and a battery system that works with other tools from the same brand.

    Built & Backyard Tip: If you plan to grow your tool collection, pick a battery platform you like and stick with it. Using the same batteries across multiple tools can save money and make your setup much easier to manage.

    2. Impact Driver

    An impact driver is built for driving screws, bolts, and other fasteners with more force than a standard drill. It’s especially useful for deck projects, framing, installing long screws, and working with tougher materials.

    Because it delivers extra torque without requiring as much pressure from you, an impact driver can make bigger DIY jobs feel much easier.

    Built & Backyard Tip: A drill and impact driver make a great pair. Use the drill for making holes and the impact driver for driving screws and fasteners.

    3. Circular Saw

    A circular saw is a versatile tool for cutting lumber, plywood, and other sheet materials. It’s a great choice for projects like building shelves, making simple furniture, repairing decks, or cutting boards to size.

    A standard 7-1/4-inch circular saw is a good all-around option for most homeowners. Look for one with an easy depth adjustment, a comfortable handle, and a clear cutting guide.

    Built & Backyard Tip: Take your time setting up a straight cutting line before you start. A simple guide or straight edge can make a big difference in how clean your cuts turn out.

    4. Jigsaw

    A jigsaw is ideal when you need to make curved cuts, cut openings, or work in places where a circular saw isn’t practical. It’s useful for projects involving plywood, countertops, shelving, laminate, and decorative woodworking.

    For most weekend DIY work, a corded or cordless jigsaw with variable speed will handle plenty of jobs around the house.

    Built & Backyard Tip: The blade makes a big difference. Use a blade designed for the material you’re cutting, and let the saw do the work instead of forcing it through the cut.

    5. Random Orbital Sander

    A random orbital sander can save a lot of time when you’re smoothing wood, refinishing furniture, preparing surfaces for paint, or cleaning up rough edges on DIY projects.

    It moves in a random pattern that helps reduce visible sanding marks, making it easier to get a smooth finish even if you’re not an experienced woodworker.

    Built & Backyard Tip: Start with a coarser grit for rough surfaces, then work your way up to a finer grit for a smoother finish. Don’t press down too hard — let the sander do the work.

    6. Oscillating Multi-Tool

    An oscillating multi-tool is one of the most versatile power tools you can keep around. With the right attachment, it can cut drywall, trim wood, remove grout, scrape adhesive, sand tight spaces, and handle plenty of small repair jobs.

    It’s especially useful for projects where larger saws or sanders simply won’t fit.

    Built & Backyard Tip: Keep a small assortment of blades and attachments on hand. The tool becomes much more useful when you can quickly switch between cutting, scraping, and sanding.

    7. Reciprocating Saw

    A reciprocating saw is made for tougher cutting jobs where precision matters less than speed and power. It’s useful for demolition, cutting through old lumber, trimming branches, removing damaged materials, and breaking down larger pieces during renovation projects.

    For homeowners, a cordless model can be especially convenient because you can use it around the yard, garage, or house without worrying about an extension cord.

    Built & Backyard Tip: Match the blade to the job. Different blades are made for wood, metal, demolition, and pruning, and using the right one makes the saw work much better.

    Build a Power Tool Setup That Fits Your Projects

    You don’t need every power tool on the market to handle most weekend projects. Start with the tools you’re most likely to use, then add to your collection as your projects get bigger.

    A solid drill, saw, sander, and a few versatile specialty tools can cover a huge range of repairs and DIY upgrades around the house.

    At Built & Backyard, we focus on practical tools and gear that help you get more done without overcomplicating the job.

  • 10 Tools Every Homeowner Should Have in Their Garage

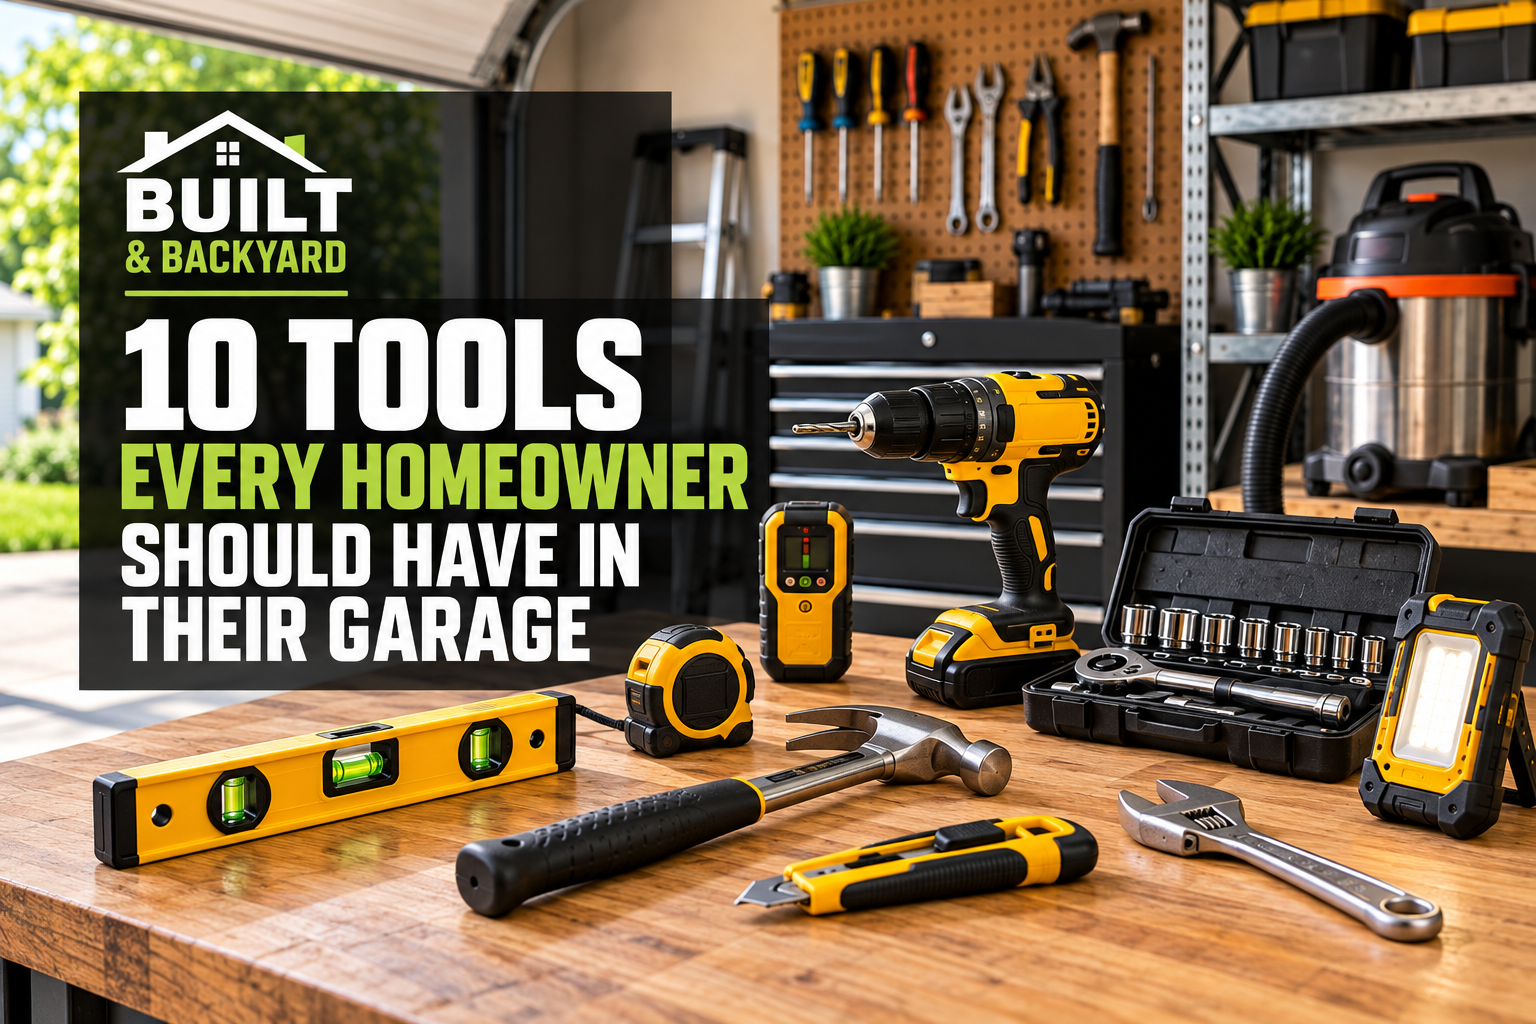
    10 Tools Every Homeowner Should Have in Their Garage

    You don’t need a garage full of expensive tools to handle everyday projects around the house. A few dependable basics can cover everything from hanging shelves and assembling furniture to making quick repairs and tackling weekend DIY projects.

    Here are 10 tools every homeowner should have in the garage—and why each one earns its spot.

    1. Cordless Drill

    A cordless drill is one of the most useful tools a homeowner can own. You can use it for hanging shelves, assembling furniture, installing hardware, drilling pilot holes, and handling countless small repairs around the house.

    For most homeowners, an 18V or 20V cordless drill offers plenty of power without being too heavy or complicated to use. Look for one with a rechargeable battery, adjustable clutch settings, and a comfortable grip.

    Built & Backyard Tip: If you’re buying into a cordless tool system, choose a brand that offers plenty of other tools that use the same battery. That can save you money as your collection grows.

    2. Socket and Ratchet Set

    A good socket and ratchet set is useful for everything from tightening loose bolts on furniture to working on lawn equipment, bicycles, and basic vehicle maintenance.

    For most homeowners, a set that includes both standard and metric sockets will cover the majority of everyday jobs. You don’t need the biggest set on the shelf—just one with a solid ratchet, the common socket sizes, and a durable case to keep everything organized.

    Built & Backyard Tip: Look for a set with clearly marked socket sizes. It sounds minor, but it can save a lot of frustration when you’re trying to find the right one quickly.

    3. Tape Measure

    A tape measure is one of those simple tools you’ll use constantly. Whether you’re measuring for furniture, hanging pictures, planning shelves, checking appliance space, or starting a DIY project, accurate measurements matter.

    A 25-foot tape measure is a great all-around size for most homeowners. Look for one with a sturdy blade, easy-to-read markings, and a reliable locking mechanism.

    Built & Backyard Tip: Keep one tape measure in the garage and another inside the house. They’re inexpensive, and you’ll be surprised how often you reach for one.

    4. Claw Hammer

    A claw hammer is a basic tool, but it earns its place in almost every garage. It’s useful for driving nails, pulling nails, light demolition, assembling projects, and making quick repairs around the house.

    For general home use, a 16-ounce hammer is a good all-around choice. Look for one with a comfortable grip and good balance so it’s easy to control.

    Built & Backyard Tip: A straight, smooth-faced hammer is usually the best choice for homeowners because it’s versatile and less likely to damage finished surfaces.

    5. Utility Knife

    A utility knife is one of the most useful small tools to keep nearby. It’s perfect for opening boxes, cutting drywall, trimming carpet, slicing through plastic packaging, and handling dozens of quick jobs around the house.

    Look for one with a comfortable grip, an easy blade-change system, and a secure locking mechanism.

    Built & Backyard Tip: Keep a pack of replacement blades in your toolbox. A sharp blade is safer and works much better than trying to force a dull one through material.

    6. Adjustable Wrench

    An adjustable wrench is a great tool to have when you need to tighten or loosen nuts and bolts but don’t have the exact-size wrench nearby. It’s especially useful for plumbing repairs, furniture assembly, outdoor equipment, and general household maintenance.

    For most homeowners, an 8-inch or 10-inch adjustable wrench is a good all-purpose size. Look for one with smooth jaw adjustment and a comfortable handle.

    Built & Backyard Tip: Adjustable wrenches work best when the jaws are snug against the fastener. A loose fit can round off the edges of a nut or bolt.

    7. Level

    A level helps make sure shelves, pictures, cabinets, and other projects are straight before you permanently attach anything. It’s a simple tool, but it can make a big difference in how finished projects look.

    A 24-inch level is a good general-purpose size for most homeowners. A smaller torpedo level is also handy for tight spaces and quick checks.

    Built & Backyard Tip: Check the level before drilling or fastening anything into place. A few extra seconds can save you from having to redo the job later.

    8. Stud Finder

    A stud finder makes it much easier to safely hang shelves, TVs, cabinets, and other heavier items on a wall. Instead of guessing where the wall studs are, a stud finder helps you locate them quickly.

    For most homeowners, a basic electronic stud finder is enough for everyday projects. Look for one that can detect both the center and edges of a stud.

    Built & Backyard Tip: After locating a stud, mark the spot lightly with a pencil before drilling. It helps keep everything lined up and saves you from having to scan the wall again.

    9. Shop Vacuum

    A shop vacuum is one of the most useful cleanup tools you can keep in the garage. It can handle sawdust, dirt, small debris, and many wet messes that you wouldn’t want anywhere near a regular household vacuum.

    For most homeowners, a medium-size wet/dry vacuum offers a good balance between power, capacity, and storage space. Look for one with a long hose, useful attachments, and wheels that make it easy to move around.

    Built & Backyard Tip: Use the right filter for the job, especially when cleaning up fine dust. It can improve suction and help keep dust from blowing back into your workspace.

    10. Rechargeable Work Light

    A good work light is easy to overlook until you’re trying to fix something in a dark garage, under a sink, in an attic, or outside after sunset. A rechargeable LED work light gives you bright, portable lighting without having to drag around an extension cord.

    Look for one with multiple brightness settings, a rechargeable battery, and a stand or magnetic base so you can position it where you need it.

    Built & Backyard Tip: A magnetic work light is especially useful in the garage because you can attach it to metal shelving, a toolbox, or other surfaces and keep both hands free while you work.

    Build Your Tool Collection One Piece at a Time

    You don’t need to buy every tool at once. Start with the basics you’ll use most often, then add to your collection as new projects come up.

    A dependable set of tools can make everyday repairs easier, save money on small jobs, and give you more confidence when tackling projects around the house.

    At Built & Backyard, we’re all about practical tools, smarter projects, and gear that actually earns its place in your garage.

  • 7 Easy Backyard Upgrades That Make a Big Difference

    7 Easy Backyard Upgrades That Make a Big Difference

    You don’t need a huge budget or a complete backyard makeover to make your outdoor space more enjoyable. A few simple upgrades can improve comfort, organization, and curb appeal while still being realistic weekend projects. Here are seven easy ideas that can make a big difference.

    1. Add Outdoor Lighting

    String lights, solar pathway lights, or simple wall-mounted fixtures can make your backyard feel more welcoming while also improving visibility at night. Start with the areas you use most, such as a patio, walkway, or seating area.

    2. Create a Comfortable Seating Area

    A small seating area can make your backyard feel more usable. A couple of outdoor chairs, a bench, or a simple patio set can create an easy place to relax, eat, or spend time with family and friends.

    3. Add Mulch or Refresh Landscaping

    Fresh mulch, trimmed plants, and cleaned-up flower beds can make a yard look more finished with very little effort. Focus on the areas closest to your patio, walkway, or front-facing fence line for the biggest visual impact.

    4. Add a Simple Fire Pit Area

    A basic fire pit area can give your backyard a natural gathering spot. Keep it simple with a safe fire pit, a few outdoor chairs, and a clear area around it so the space feels comfortable without requiring a major build.

    5. Add Outdoor Storage

    A weather-resistant deck box, small shed, or storage bench can help keep cushions, garden tools, toys, and outdoor supplies organized. Choose something that fits the space without making the yard feel crowded.

    6. Upgrade Your Patio or Walkway

    Pressure washing, replacing a few damaged pavers, or adding simple edging can quickly freshen up a patio or walkway. Small improvements to these high-traffic areas can make the whole backyard feel cleaner and more put togther.

    7. Create a Simple Outdoor Dining Spot

    A small table and a few outdoor chairs can turn part of your backyard into an easy place for meals, coffee, or entertaining. Keep the setup simple and place it near the house or patio so it’s convenient to use.

    You don’t need a complete backyard renovation to make your outdoor space better. Start with one simple project, focus on the areas you use most, and build from there. Small upgrades can make your backyard more comfortable, organized, and enjoyable all season long.

  • 5 Easy Home Upgrades You Can Do in One Weekend

    5 Easy Home Upgrades You Can Do in One Weekend

    You don’t need a major renovation to make your home feel better. A few simple weekend upgrades can improve the look, function, and comfort of your space without taking over your whole schedule. Here are five practical projects you can knock out in a weekend.

    1. Upgrade Your Cabinet Hardware

    Replacing outdated knobs and pulls is one of the quickest ways to refresh a kitchen or bathroom. Choose hardware that matches the style of the room and use the existing screw holes whenever possible to keep the job simple.

    2. Replace Old Light Fixtures

    Replacing an outdated light fixture can instantly make a room feel more modern. Start with a simple swap in an entryway, hallway, bathroom, or dining area, and always turn off power at the breaker before removing the old fixture.

    3. Refresh a Room with Paint

    A fresh coat of paint can completely change the feel of a room without a major renovation. Focus on one room or one accent wall, prep the surface wall, and choose a color that works with the lighting and furniture already in the space.

    4. Add Simple Wall Storage

    Floating shelves, wall hooks, and simple organizers can add useful storage without taking up floor space. Entryways, bathrooms, laundry rooms, and garages are all great places to add a little extra organization in just a few hours.

    5. Upgrade Your Entryway

    A few small changes can make your entryway more welcoming and functional. Consider adding a new doormat, hooks for your keys or bags, a small bench, or a simple piece of wall decor to give the space a finished look.

    You don’t have to tackle a huge renovation to make your home feel better. Pick one project, keep it simple, and build from there. Small upgrades can make a big difference when they improve both the look and function of your space.

  • 3 Simple Garage Upgrades That Make Weekend Projects Easier

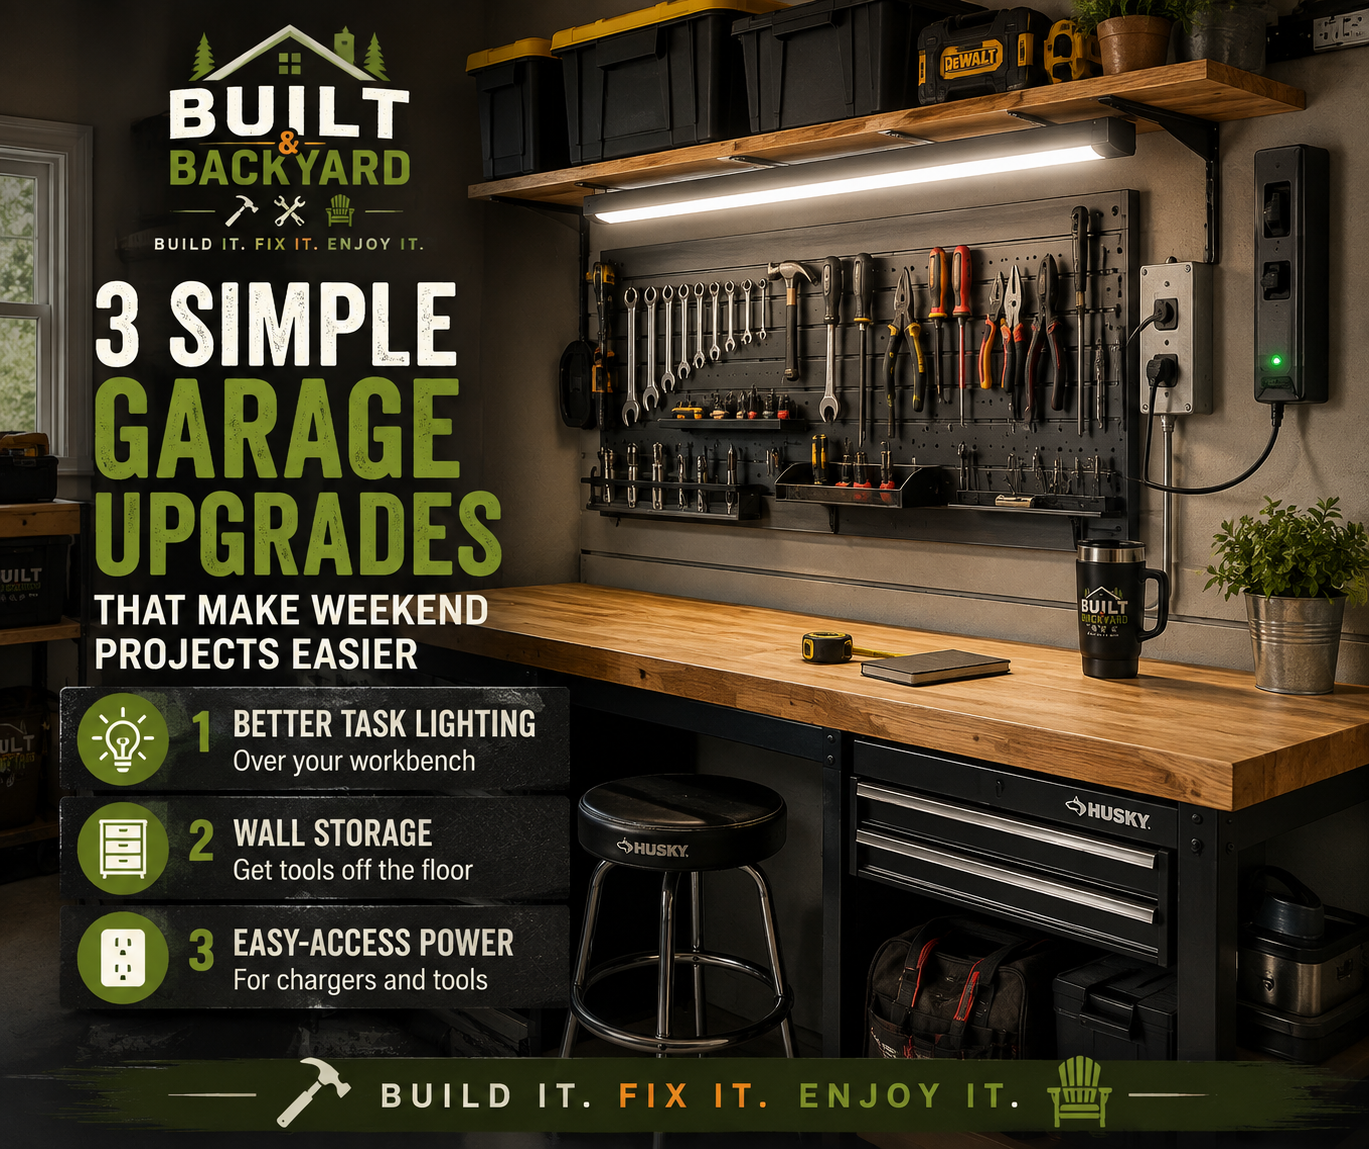
    3 Simple Garage Upgrades That Make Weekend Projects Easier

    A better garage doesn’t require a full remodel. A few well-chosen upgrades can make your workspace brighter, more organized, and easier to use-especially when you’re tackling weekend projects.

    1. Improve Your Task Lighting

    Good lighting makes a huge difference when you’re working on detailed repairs or projects. A bright, adjustable task light over your workbench can reduce shadows and make it easier to see exactly what you’re doing.

    2. Get Tools Off the Floor

    Wall-mounted storage, pegboards, cabinets, and study shelving can free up valuably floor space while keeping frequently used tools within easy reach. A little organization can make a small garage feel much more workable.

    3. Add Easy-Access Power

    Having power where you need it can save time and keep your workspace organized. Consider adding easily accessible outlets near your workbench and charging areas so you’re not constantly reaching for extension cords or moving tools around.

    Small Upgrades, Big Difference

    You don’t have to transform your entire garage at once. Start with better lighting, smarter storage, and convenient power, then build from there. The goal is a workspace that makes your projects easier and more enjoyable.